03 Nov What you need to know about paint touch-ups for your walls
Most of us have walls in our homes that need some paint touch-ups. Yes, even me! And if you have children, maintaining pristine walls can feel challenging, if not impossible. So here’s our advice on how to do those touch-ups. By utilizing proper techniques, you can easily touch up specific areas of your wall paint, ensuring a flawless and freshly painted look for your walls.
Step 1: Clean the Wall
We recommend cleaning the wall using some mild detergent and a sponge. Do this before you attempt any wall repairs. Any dirt, dust, or grime on the wall will prevent the paint from properly adhering to the surface. Be sure to dry the wall with a clean towel and allow the surface to dry completely before proceeding to the next steps.
Step 2: Wall Repairs
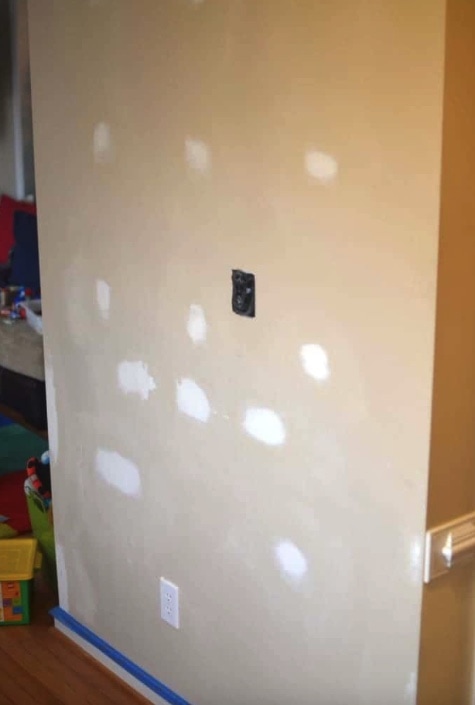
You can use the spackling compound to fill in any scratches, small hotels, or dents in the wall. Be sure to follow the manufacturer’s instructions for the compound. If you have holes or damage 2″ or more in width, you will likely need a wall-repair patch instead.
Step 3: Prime the Wall
Once you’ve made any necessary repairs, you will want to prime over them for the best paint adhesion and color blending. (If you skip the primer, the touched-up area will likely stand out from the rest of the painted surface.) Be sure to use a high-quality interior latex primer. Quality matters greatly in paint products. It might be necessary to ventilate the area while priming. Be sure to follow the manufacturer’s instructions!
For best results, you’ll want to keep the area you’re priming to the same size as the repair or touch-up needed. To apply the primer, use a small to medium-sized paintbrush (depending on the size of the area) to brush on a layer of primer. Let the primer dry completely before applying the paint.
Step 4: Type of Paint
Ideally, you have paint leftover from when the wall was painted for the best color match. If not, you must purchase the paint in the same color, brand, and sheen for touch-ups.
Step 5: Applying Paint
If you can, use the same type of applicator that was used to paint the previous coat of paint on the wall. So, if a roller was used, that’s what you should use for touch-ups. For minor touch-ups, such as small holes or marks, you can use an angled foam brush or thin paintbrush to lightly dab paint on the spot. This helps the newly touched-up area blend with the surrounding wall by replicating the surface texture. We recommend applying as little paint as possible at a time. Be sure to blend the edges of the touched-up area with the surrounding area.
Step 6: Once the Paint Dries
Follow the paint manufacturer’s instructions about paint drying times. Once that’s done, it’s time to assess the touched-up areas. Look at the spot from various angles and lighting. Remember that most people won’t even notice a touched-up site because they won’t be looking at your walls so closely! But if needed, you can add a second coat.
Project Shopping List
Here’s what you’ll need to complete this project successfully.
-
-
-
- Sponge
- Mild detergent
- Towel
- Spackling compound
- Fine-grit sandpaper
- Putty knife
- Cloth
- Wall-repair patch (optional)
- Joint compound
- EasyCare Ultra Premium Interior Primer/Sealer
- EasyCare Ultra Premium Interior Paint
- Small or medium-sized paintbrush
- Small roller applicator (optional)
- Angled foam brush (optional)
-
-
Remember, if you’re not satisfied with the results of your touch-up efforts, you can always repaint the entire wall or room. If the results of your touch-up aren’t satisfying, repainting the room is always an option. You’re welcome to reach out to us to discuss your painting needs.

Mike Katounas is the owner of Home Works Painting, a painting business in Northern Virginia. He has over 15 years of experience in residential interior and exterior painting, drywall installation/repair, carpentry, wallpaper removal, power washing, commercial painting, color consultation, and staining/sealing. Their service areas include Chantilly, Fairfax, Herndon, Oakton, Reston. Mike takes pride in his work, and he always follows a strict code of conduct that includes the use of quality paint, a clean workspace, and an honest, respectful approach to his customers.


Sorry, the comment form is closed at this time.