06 Nov Painting Wall Stripes
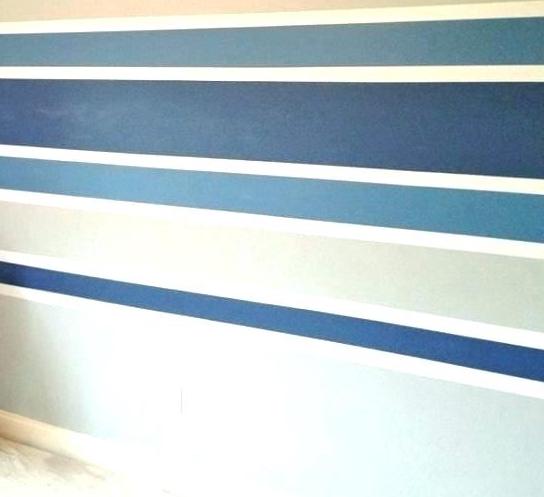
If you have a blank wall, paint, and some design ingenuity along with lots of patience, creative skills, and some tools, what can you create? The answer is a spectacular wall effect of painted wall stripes. Rather than installing wallpaper, which can be an expensive undertaking, you can often obtain the same result with paint.
Here’s a high-level look at what it takes to create painted wall stripes in your home.
DIY or professional:
So, how great of a painter are you? Painting wall stripes can be a DIY project if you are a skilled and resourceful painter. However, most painted stripe projects are less DIY and more for a professional; meaning you leave it to us, the pros. While a simple design can be a straightforward project, that doesn’t always mean it’s easy. Painting a wall of stripes can be time-consuming and rarely something you knock out in a few hours.
TOOLS
- drop cloth
- ladder
- high-quality paint roller
- high-quality brush
- paint tray
- laser level
- yardstick
MATERIALS
- tape measuring
- painter’s blue tape
- flat paint
- paint
- paint extender
Color and contrast:
You can use a single color alternating flat and high gloss sheens between stripes for a very subtle effect. Tone on tone stripes uses two closely related shades of one color for subtle contrast. For a bold effect, you can use contrasting colors on opposites sides of the color wheel. In most cases, we recommend using this effect more sparingly. It can overwhelm a room.
Horizontal or vertical:
Horizontal stripes can make a room look broader or larger while vertical lines can make the walls look taller or the ceiling higher. Consider the shape and size of the room before you select one or the other. Consider also whether you’re painting just one wall or an entire room.
Measure:
Careful measuring is key to a successful result. Decide on the width then measure and mark the walls. Typically, you don’t want very narrow or very wide stripes. We suggest no less than 5 to 6″ minimum width and roughly 12″ to 14″ wide. Thin lines can look busy while very broad stripes can make a room feel heavy.
You’ll need to decide how to deal with corner stripes. Are you ok with a narrower strip at your wall or ceiling joint because you ran out of space for a full-sized stripe or would you rather have an equal width of all stripes, including at joints?
Prep walls:
If you are changing the base wall color, paint that first, then wait at least 48-72 hours before taping walls for the stripes. Once your base color is completely dry, then you’re ready to begin taping your walls. It’s critical that you take your time measuring and taping. Make sure the tape is burnished flush with the wall to avoid paint seeping underneath. Once you’ve taped the walls, check that everything is straight and well measured. Otherwise, you could find yourself with a crooked stripe which can create a domino effect with other stripes end up crooked – not a pretty look.
Painting:
Use high-quality products and tools. Start at the corners and work your way toward the center of the room (if it’s vertical) or at the top or bottom of the wall and work your way toward the center of the wall (if it’s horizontal).
If you’re painting over a base color, then remember you’re only painting only every other stripe.
Summary:
Painted wall stripes can be well worth the time and effort it takes, transforming a room and adding design interest. If you’d like to talk to us about your dreams of a striped wall, give us a call. We’d be happy to talk through your project ideas.

Mike Katounas is the owner of Home Works Painting, a painting business in Northern Virginia. He has over 15 years of experience in residential interior and exterior painting, drywall installation/repair, carpentry, wallpaper removal, power washing, commercial painting, color consultation, and staining/sealing. Their service areas include Chantilly, Fairfax, Herndon, Oakton, Reston. Mike takes pride in his work, and he always follows a strict code of conduct that includes the use of quality paint, a clean workspace, and an honest, respectful approach to his customers.


Sorry, the comment form is closed at this time.