25 Nov Kitchen Updates Without Remodeling—FAQs & Paint-First Ideas from a Painting Company in Vienna, VA
A kitchen refresh doesn’t have to mean demolition, months of dust, or a five-figure budget. With the right paint plan—and a few smart carpentry tweaks—you can get a brighter, cleaner, more functional space in days, not weeks. Here’s a skimmable, FAQ-driven guide from a Painting Company in Vienna, VA, packed with color strategies, surface prep tips, and sequencing that keeps your home running while the work gets done.
If you want tailored recommendations, samples, and scheduling options, our local team can map out a plan that fits your timeline and style.
Why a “paint-first” kitchen upgrade works
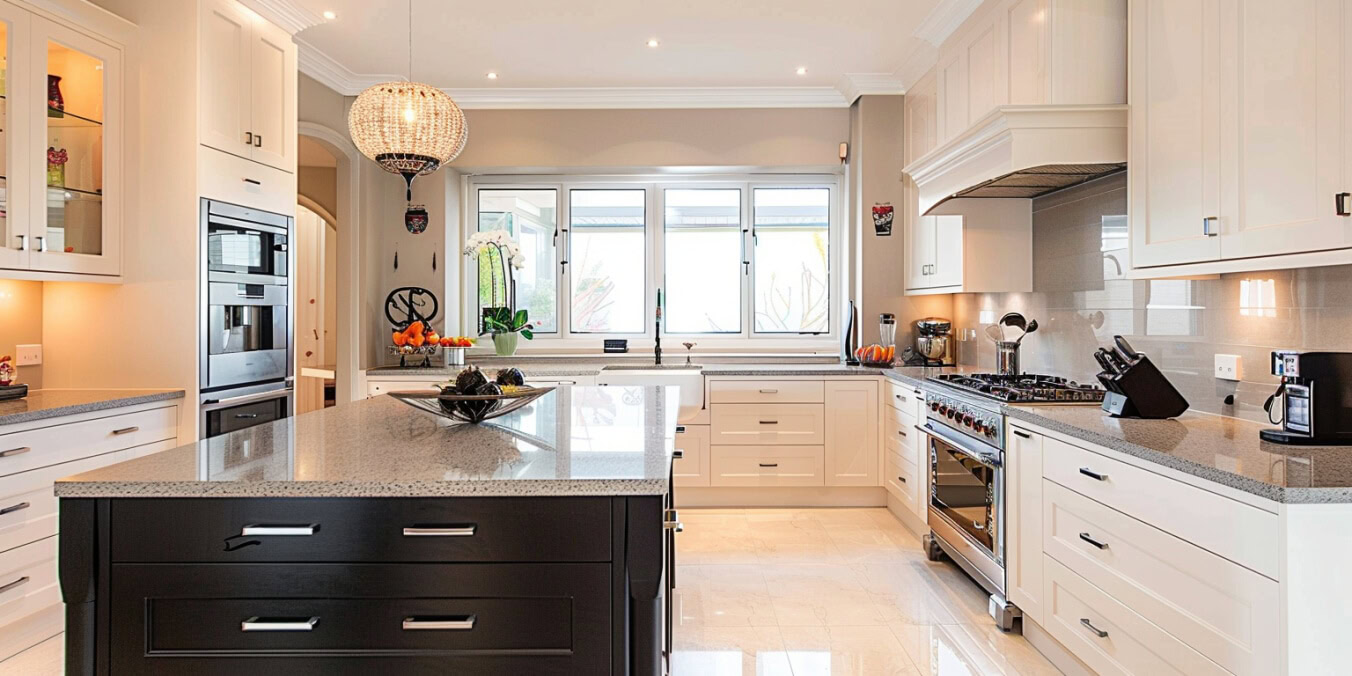
A kitchen is a mix of planes and profiles—cabinets, walls, ceilings, trim, and key accents like islands and pantries. When those elements are unified with coordinated colors, sheens, and prep, the room reads as updated even if the layout stays the same. Paint can also protect high-touch surfaces, extend the life of your cabinetry, and let your finishes evolve with your taste.
Quick wins (at a glance)
- Cabinets: Factory-smooth finishes in durable satin or semi-gloss
- Islands: Accent color for a custom, furniture-like focal point
- Walls & ceilings: Light, low-glare hues to amplify natural and task lighting
- Trim & doors: Crisp profiles that frame tile and counters
- Micro-carpentry: Fillers, crown, end panels, and toe-kick repairs that make paint pop
- Hardware swap: New pulls/knobs modernize the look with minimal cost
FAQ 1: What should I paint first—cabinets, walls, or trim?
Sequence is everything. To keep edges crisp and downtime low, pros typically:
- Protect & prep: Mask floors and counters; remove doors/drawers; label hardware.
- Cabinetry first: Clean, degloss/scuff-sand, repair, prime, then finish doors, drawers, and frames.
- Trim & doors: Baseboards, window/door casings, and pantry or back-door surfaces get their coatings.
- Walls & ceilings last: Cut to the cured trim for the sharpest lines and the least touch-up.
This order limits overlap, speeds the project, and keeps your kitchen more usable each day.
FAQ 2: Which cabinet paint finish looks best and lasts the longest?
For most homes, satin hits the sweet spot: soft sheen, easy to clean, and kind to minor surface variations. Semi-gloss is great for busier homes or darker colors that benefit from extra wipeability. Pair either with a bonding primer that locks onto existing finishes and resists chipping.
Pro touch: Aim for a sprayed or sprayed-and-back-rolled finish on doors and drawer fronts for that furniture-smooth feel. Frames can be sprayed in place (with proper containment) or brushed/rolled with fine-finish tools to match.
FAQ 3: Can I paint oak cabinets and hide the grain?
You can soften the grain substantially:
- Degrease thoroughly (oils amplify grain show-through).
- Scuff-sand to open pores.
- Grain-filling (optional), where a near-smooth look is desired.
- High-build priming followed by sanding levels the surface.
- Two topcoats in a durable enamel finish complete the system.
While heavy grain can’t vanish entirely without extensive filler work, the right system produces a refined, elegant look.
FAQ 4: Which cabinet colors feel most current in Vienna homes?
Color is personal, but these kitchen-friendly families consistently deliver:
- Creamy whites & warm whites: Brighten rooms with limited daylight and pair well with warm floors.
- Greige and taupe: Balanced neutrals that complement mixed metals and stone counters.
- Soft color (sage, dusty blue, faded black-green): Adds character without overwhelming.
- Deep island accents (navy, charcoal, inky green): Anchor the space and hide scuffs at stool seating.
Tip: Test colors on actual doors and on vertical frame sections; cabinet lighting and shadows can shift undertones more than wall samples suggest.
FAQ 5: What about the walls—matte, eggshell, or satin?
- Eggshell is the most common choice—low sheen with easier cleaning around switches, door frames, and breakfast nooks.
- Satin ups cleanability in splash-prone spots without looking shiny when paired with balanced lighting.
- Matte can work in low-traffic areas for a soft, modern feel, but it’s less forgiving at the coffee station or near the trash pull-out.
Keep the palette quiet so your cabinets and counters lead. Warm or neutral whites and pale mineral hues (mushroom, linen, pale stone) keep kitchens calm and bright.
FAQ 6: Do I need to repaint the ceiling?
Not always, but a fresh flat or matte ceiling can make everything else feel new. If your kitchen connects to a family room, use the same ceiling color to unify the spaces. In rooms with warm pendant bulbs, a neutral-to-cool white can neutralize amber shift and keep things crisp.
FAQ 7: How do I choose a color for my island?
Treat the island like a piece of furniture. It should nod to your cabinet color, but doesn’t have to match:
- Contrast approach: Light perimeter + deep island (navy/charcoal).
- Tone-on-tone: Two shades of the same family for subtle depth.
- Material tie-in: Pull a color from veining in your countertop or from a nearby built-in.
Choose satin or semi-gloss for durability where stools bump and hands rest.
FAQ 8: Can paint fix my “builder gaps” and uneven edges?
Paint makes precision visible—but micro-carpentry makes paint look phenomenal. Consider:
- Filler strips to eliminate awkward gaps near walls or appliances
- Crown molding at the upper to close ceiling gaps and elevate the profile
- Finished side panels on exposed cabinet ends for a bespoke look.
- Toe-kick repairs and fresh, clean bases that visually “lift” the cabinets
These upgrades are fast, budget-friendly, and dramatically improve the final read.
FAQ 9: What’s the best way to handle hardware?
Swapping hardware is a high-ROI step. Decide before painting to avoid drilling into fresh finishes:
- Match hole spacing to avoid patching—or
- Fill old holes, finish the surface, then template and drill for new pulls.
- Choose finishes that harmonize with faucets and lighting (mixed metals are fine when undertones align).
Polished nickel, brushed brass, matte black, and soft bronze all pair well with Vienna’s popular cabinet palettes.
FAQ 10: How long will my kitchen be out of commission?
Most paint-first kitchen refreshes are staged so you keep access to sink, fridge, and key appliances:
- Day 1: Protect, label hardware, degrease, sand, repair, and primer frames
- Days 2–3: Doors/drawers coated offsite or in a controlled on-site zone; frames get finish coats
- Day 4: Walls/ceiling/trim, island accent, minor carpentry, touch-ups
- Day 5: Reinstall doors/drawers, hardware, and final cleanup
Exact timing depends on kitchen size, drying conditions, and whether doors are sprayed offsite.
Cabinet prep that separates “good” from “lasts for years”
- Degreasing with the right cleaners so primers bond
- Scuff-sanding existing finishes—essential for adhesion
- Filling & feathering dings on doors and frame edges
- Bonding primer chosen for your current coating type
- Fine-finish sanding between coats for a glassy feel
This is the part you don’t always see, but it’s why doors close smoothly and edges look laser-clean.
Walls, backsplashes, and trim—tying it all together
- Walls: Keep them low-contrast near busy backsplashes so pattern or grout doesn’t fight the paint.
- Window & door trim: Satin or semi-gloss brightens, reveals, and frames sinks and breakfast views.
- Accent niches/shelves: Paint a shade deeper to spotlight cookbooks or pottery without clutter.
If your backsplash stays, sample wall colors against it, not just next to cabinets.
Lighting, undertones, and how to sample like a pro
Kitchen light shifts from morning to evening. Test color cards or painted swatches:
- Near windows (cooler daylight)
- Beneath pendants (warmer)
- Under the uppers, where LED strips may cool or warm the tone
Look for undertones that harmonize with counters, floors, and metal finishes. A color that feels perfect at noon may lean too yellow at night—choose the one you like most in evening light, since that’s when many families use the space.
The case for a painted pantry and interior doors
Upgrading the pantry and the back door can punch above their weight:
- Pantry interiors in a light, wipeable satin keep food areas bright and easy to clean.
- A contrasting back door (muted black, deep green) adds a tidy moment—especially when viewed from the family room.
Pair these with a matching baseboard and casing color for a cohesive perimeter.
Durable sheens (so life happens and your kitchen still looks new)
- Cabinets & island: Satin or semi-gloss for wipeability
- Trim & doors: Satin or semi-gloss for crisp, clean edges
- Walls: Eggshell or satin, depending on traffic and splash risk
- Ceiling: Flat or matte to minimize glare and hide minor waves
That gentle sheen ladder—flat → eggshell → satin/semi-gloss—adds depth without looking shiny.
Micro-carpentry checklist to consider before painting
- Add crown molding or light-rail under the uppers.
- Square and shim out-of-level end panels
- Replace damaged toe-kicks
- Install filler strips where appliances meet cabinetry.
- Upgrade end panels to shaker or paneled styles for a custom look.k
Bundling these with painting streamlines the schedule and makes every coat land on clean, correct lines.
Budget-smart pathways (choose your level of change)
Level 1: Fresh & tidy
Walls and ceilings painted, trim cleaned up, minor carpentry tweaks, and hardware swap. Great when cabinets are in decent shape.
Level 2: Cabinet-led refresh
All of Level 1 plus full cabinet refinishing and an island accent. Transforms the look without touching counters.
Level 3: Finishes facelift
Levels 1–2 plus targeted carpentry (crown, end panels), door color update, and a cohesive palette flowing into the breakfast or family room.
Each level keeps appliances in place and focuses on visual impact per dollar.
Maintenance that keeps the finish new
- Wipe cabinets with mild soap and water; avoid harsh abrasives.
- Add felt pads where the doors contact the frame.s
- Clean handles and edges regularly—high-touch spots show first.
- Keep a labeled quart of each color for tiny touch-ups.
- Review caulk lines seasonally; refresh thin beads to keep shadows away.
Small habits prevent big repaints.
Key benefits of a paint-first kitchen refresh
| Benefit | Why it matters |
| Faster timelines | Most projects wrap in days, not weeks |
| Lower cost | High impact without moving plumbing or wiring |
| Custom look | Cabinet + island colors tailored to your counters |
| Durable finishes | Enamel systems resist daily wear and stains |
| Less disruption | The staged workflow keeps the sink and fridge accessible |
| Cohesive home | Palette can extend to the mudroom, pantry, or breakfast area |
Sample 5-day plan for a mid-size Vienna kitchen
Day 1
Protect floors/counters; remove doors/drawers; label hardware; degrease; scuff-sand; minor carpentry; bonding primer on frames.
Day 2
First cabinet finish coat on frames; doors/drawers sprayed in a controlled zone; walls spot-repaired; ceiling cut and rolled.
Day 3
Second cabinet coat; island accent color; trim (window/door/base) first coat; hardware layout confirmed.
Day 4
Walls rolled to final color; trim final coat; fine-finish sanding/touch-ups; pantry interior.
Day 5
Reinstall doors/drawers; hardware installed; final inspection under daytime and evening lighting; labeled touch-up paint left with homeowner.
When to call a pro vs. DIY
Consider hiring a Painting Company in Vienna, VA if you want:
- Factory-smooth cabinet finishes that resist chips
- Dust control and clean containment around cooking areas
- Targeted carpentry paired with paint for perfect reveals
- Color sampling under your real lights, not just store bulbs
- Predictable timing with daily resets so you can keep cooking
If you’re simply repainting walls in a breakfast nook, DIY may be fine. But for full-cabinet systems or detailed islands, professional-grade gear and processes pay off every day you use the space.
Ready to plan your kitchen refresh?
If you’re aiming for a brighter, calmer kitchen without a remodel, we’d love to help. Talk with our Painting Company in Vienna, VA, about colors, sheen choices, scheduling, and staging work so your kitchen stays functional from breakfast to bedtime.
Five extra FAQs
1) Will my cabinet paint yellow over time?
High-quality enamel systems are engineered for color stability. Choose products designed for cabinets and avoid harsh cleaners that can discolor finishes.
2) Can you match my existing trim white?
Yes. We can color-match or recommend a neutral white that complements floors, counters, and the backsplash, so the whole room feels intentional.
3) What if my counters are staying but feel dated?
Use tone-balancing: paint the cabinets and walls in undertones that flatter the counter, then add a contrasting island and fresh hardware to modernize the room.
4) Do I need to empty all cabinets?
For door removal and framework, we typically only need the front edges cleared. We’ll let you know if a section needs to be fully emptied for repairs or adjustments.
5) How soon can I use the kitchen normally?
Usually, the next day for light use, with full cure taking 1–2 weeks to build. We’ll share care guidelines so you can cook, wipe, and enjoy without worry.
If you’d like a color consult, a written schedule, and a clear proposal, reach out to our Painting Company in Vienna, VA, and we’ll get your refresh on the calendar.

Mike Katounas is the owner of Home Works Painting, a painting business in Northern Virginia. He has over 15 years of experience in residential interior and exterior painting, drywall installation/repair, carpentry, wallpaper removal, power washing, commercial painting, color consultation, and staining/sealing. Their service areas include Chantilly, Fairfax, Herndon, Oakton, Reston. Mike takes pride in his work, and he always follows a strict code of conduct that includes the use of quality paint, a clean workspace, and an honest, respectful approach to his customers.


Sorry, the comment form is closed at this time.