14 May Solve the Mystery: What Causes Interior Paint to Peel?
Stepping into a freshly painted room can evoke a sense of renewal, but when peeling paint becomes the headlining feature, it’s a mystery begging to be solved.
Various culprits, from invasive moisture to the harshness of heat and humidity, conspire against the longevity of our beloved walls.
It’s not just about the paint—it’s an interplay of materials, methods, and the relentless march of time.
Your role in understanding these stealthy saboteurs is crucial to maintaining the aesthetics and health of your home. By being informed, you can take proactive steps to prevent paint peeling and ensure the longevity of your walls.
Unwrapping the Layers: How Moisture Causes Paint to Peel
Peering beneath the curled edges of paint in your living room can feel like an unwelcome mystery, but it’s one that often points to a single culprit: moisture.
The integrity of your home’s painted surfaces vastly depends on the delicate balance of humidity levels.
If left undetected, moisture can seep stealthily behind the sheen of your walls, leading to unsightly peeling.
Recognizing the science behind moisture damage is paramount to preserving the aesthetics of your interior spaces.
In this piece, we’ll equip you with practical techniques to spot hidden sources of dampness. With this knowledge, you’ll be well on your way to maintaining a pristine and polished household, feeling confident in your ability to tackle any paint-peeling issues.
The Science Behind Moisture Damage and Paint
Mystery often shrouds the reason behind peeling paint in the comfort of our homes, yet the answer frequently lies in the battle between paint and moisture. It’s a scientific skirmish where water vapor challenges the adhesion of paint to surfaces, inching its way under layers and compelling them to relinquish their hold on walls, ultimately causing the paint to lift and peel away.
My understanding of this phenomenon deepens with the acknowledgment that the type of paint and the surface it clings to can be pivotal in mitigating moisture’s insidious effects. Moisture can seep into the walls, causing them to become damp and promoting the growth of mold and mildew. This cannot only lead to peeling paint but also pose health risks. Quality paints engineered with suitable properties form a stronger bond that resists moisture intrusion. At the same time, poorly ventilated spaces heighten the risk of dampness, leading to a potentially unsightly result that none of us desire on our interior walls.
Detecting Hidden Moisture Sources in Your Home
Detecting hidden sources of moisture in our homes often starts with keen observation of everyday spaces. For instance, a common culprit is window condensation, which can let dampness seep into window sills and surrounding areas. Other potential sources could be leaking pipes, roof leaks, or even high humidity levels in the home. Investigating these areas for compromised seals or inadequate insulation is a sensible first step in this detective work.
A systematic approach is crucial when hunting these elusive moisture contributors; I focus on areas around the house known for their interaction with water. This includes plumbing fixtures, under sinks, and around appliances that use or expel water, like washers and dryers. Even a tiny, persistent leak can herald the onset of a problem:
| Space | Signs of Moisture | Action Plan |
|---|---|---|
| Under sinks | Water stains, musty odors | Inspect piping and fix leaks |
| Around windows | Condensation, wood rot | Seal windows, improve airflow |
| Laundry area | Damp walls, rust stains | Check appliances to ensure ventilation |
When Heat and Humidity Take Their Toll on Paint
Moving on from hidden moisture sources, let’s delve into another critical influence on your home’s painted walls: the impact of heat and high ambient temperatures.
As a proficient house painter, I’ve witnessed firsthand how a home can fall victim to the relentless pressure of humidity. When coupled with heat, humidity exacerbates the deterioration of indoor paint. Heat causes the paint to expand, and when it cools down, it contracts. This constant movement can weaken the paint’s grip, leading the once immaculate finish to crack and peel. Understanding this process can help homeowners take proactive steps to prevent it.
To safeguard against this, a deeper comprehension of how high temperatures affect paint adhesion is essential.
In the upcoming sections, we will dissect heat’s role and discuss strategies to mitigate humidity’s corrosive effects, ensuring that paint remains firmly intact and that the home’s interior retains its intended beauty without the unsightly blemish of peeling surfaces. These strategies include using dehumidifiers, improving ventilation, and choosing paints resistant to humidity. Implementing these strategies can help homeowners maintain the aesthetics of their homes.
Understanding the Effects of High Temperatures on Indoor Paint
As a professional painter, I’ve seen paint’s resilience tested under the sweltering embrace of high temperatures. Paint’s resilience refers to its ability to withstand and recover from adverse conditions. Indoor paint isn’t merely a decorative choice; it’s a layer vulnerable to the expansion and contraction caused by heat. This constant movement can weaken the paint’s grip, leading the once immaculate finish to crack and peel, betraying the careful attention to detail that went into choosing the perfect color and applying the coat. Understanding this can help homeowners choose the right type of paint for their homes.
Factoring in high temperatures into the longevity of your indoor paintwork becomes critical when maintaining the aesthetics and integrity of a space. The management of internal climate, through adept use of air conditioning or strategic ventilation, can be the difference between a durable, even coat and a prematurely aging surface that demands attention and, inevitably, another visit with brush and bucket. For instance, in the kitchen, where heat sources like ovens and stoves are familiar, enhancing ventilation and taking regular cooling breaks can help maintain a stable temperature and prevent paint from peeling.
| Room | Heat Sources | Mitigation Strategy |
|---|---|---|
| Kitchen | Ovens, stoves, appliances | Enhance ventilation, regular cooling breaks |
| Attic | Lack of insulation, sun exposure | Improve insulation, install attic fans |
| Bathroom | Steam from shower, hot water usage | Use exhaust fans, open windows when possible |
Combatting Humidity to Prevent Peeling Paint
Preventing the progression of peeling paint due to humidity requires an intentional course of action, especially in damp regions. To thwart this pervasive issue, employing dehumidifiers in moisture-prone areas of the home can serve as an effective barrier against the excess water vapor that threatens to undermine the paint’s adhesive properties.
Furthermore, when painting or repainting interior spaces, selecting high-quality paints specially formulated to resist humidity is another proactive step to consider. The inclusion of these advanced paints, in conjunction with vigilance over the indoor climate, can substantially extend the life of a paint job, keeping walls and ceilings looking immaculate:
| Room | Humidity Control | Paint Choice |
|---|---|---|
| Bathroom | Install exhaust fans, keep windows open | Moisture-resistant paint with mildewcide |
| Basement | Use dehumidifiers, monitor humidity levels | Waterproofing paints or primers |
| Laundry Room | Proper ventilation, avoid air-drying clothes indoors. | Durable, washable paint finish |
Consistency in monitoring and adjusting the interior environment is critical to preventing peeling paint. By meticulously managing the moisture levels throughout the home and choosing paint suited to these variable conditions, you can maintain a flawless finish, feeling secure in the knowledge that you’re thwarting the silent advance of humidity and its erosive effects.
Poor Preparation and Application Mistakes Exposed
Before the first stroke of paint graces a wall, careful preparation is often overlooked in the rush to transform a room.
A chronic issue I’ve witnessed is interior paint peeling, typically rooted in pre-painting errors that reveal themselves after a ‘completed’ project. These errors can include not cleaning the surface properly, not using a primer, or not allowing the surface to dry completely before painting. Avoiding these mistakes can help ensure a long-lasting paint job.
My approach to painting always centers on meticulous surface groundwork.
This is the phase where imperfections are addressed, and the foundation for the paint’s adherence is set—a critical stage that prevents future peeling.
Today, I’ll share insights into identifying these common preparation mistakes and the correct methods to ready surfaces, effectively nipping the peeling conundrum in the bud.
Identifying Pre-Painting Errors That Lead to Peeling
Embarking on a painting project without recognizing pre-painting pitfalls is akin to building on sand; it sets the stage for instability and eventual failure. Before laying down that initial layer of primer or color, a thorough inspection must take precedence for signs of existing moisture damage, grease spots, or unresolved surface imperfections.
A revealing tell that pre-painting preparation had insufficient surfaces after the paint had dried and time-weathered the walls: bubbling, cracking, or peeling becomes apparent. These defects often stem from skipping crucial steps like cleaning the walls, sanding to create a surface that paint can adhere to, and not applying an appropriate primer tailored to cover stains or provide a moisture barrier:
- Inspect walls meticulously for imperfections or damage.
- Clean and sand surfaces thoroughly before painting.
- Choose and apply the correct primer for the job.
The Right Way to Prepare Surfaces for Painting
When embarking on a painting endeavor, I always emphasize the importance of starting with a blank canvas. My practice is to meticulously clean the surface to ensure no oils, dirt, or residues remain that might impede the paint’s ability to bond seamlessly with the wall.
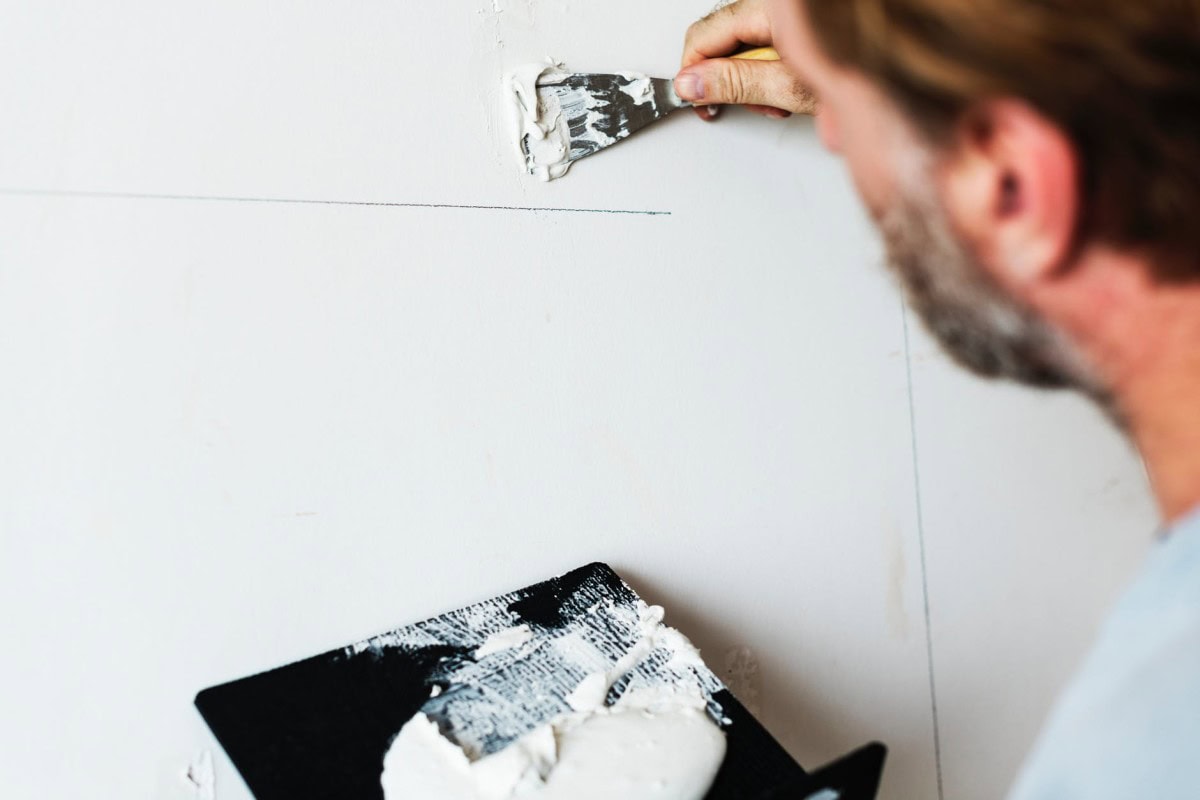
Following cleansing, I diligently scrutinize every inch for cracks or peeling areas, using a putty knife to fill in any gaps with high-quality putty. Then, I gently sand down the surface to a smooth finish, ready to welcome the first coat.
Navigating Chemical Reactions Between Paint and Walls
Embarking on refreshing my home with a new coat of paint, I’ve learned that the relationship between wall material and paint is akin to a complex dance, with each step needing to be ideally in sync.
Recognizing incompatible paint types with my wall material stands at the forefront of this process.
Within the walls of my home, I confront the challenge head-on as I determine the chemistry between paint and surface for a flawless and enduring finish.
In pursuing harmonious décor, I am about to share how I tackle the complexities of chemical imbalances affecting interior walls, uncovering solutions that ensure the paint adheres and flourishes, accentuating the space with vibrancy and resilience.
Recognizing Incompatible Paint Types With Your Wall Material
The dance between wall material and paint is intricate; recognizing when the two are out of step is essential to avoid a finicky finish. My approach emphasizes careful selection, ensuring the paint formulation is compatible with my home’s specific wall surfaces—plaster, drywall, or masonry—and avoiding adverse chemical reactions that lead to peeling or blistering.
My experience shows that while gloss and semi-gloss finishes are appealing for their sheen and ease of cleaning, they can sometimes perform poorly on textured or uneven surfaces, leading to premature wear. I prioritize matching the correct type of paint to the wall’s composition, considering factors like porosity, texture, and existing paint type to ensure a durable, long-lasting finish.
Solutions for Chemical Imbalances Affecting Your Interior Walls
To address chemical imbalances affecting interior walls, I first adopt a role akin to a chemist, meticulously mixing the proper balance of paint and sealants tailored to the surface. A primer specifically designed to neutralize high pH levels on new masonry or to seal porous surfaces ensures a stable base for subsequent paint layers, a pivotal step in achieving a smooth and lasting finish.
Another layer of my strategy involves testing small patches of the chosen paint on different wall areas, a prudent measure that illuminates potential compatibility issues before they manifest across an entire room. Through careful observation of how the paint cures and adheres, I can confidently adjust the paint selection or preparation techniques accordingly:
- Evaluate the wall surface and choose a primer that addresses its specific needs.
- Conduct patch tests with the selected paint to verify compatibility.
- Monitor the curing process to ensure proper adhesion and finish.
The Impact of Time – When Age Takes Over
As a seasoned professional in home improvement, I’ve witnessed how the passage of time can operate as an invisible agent, wearing down the resilience of interior paint. Like us, our walls age, and after years of service, the once vibrant layers of paint begin to show their years through cracking and peeling.
Periodic updates in color and style aside, the necessity to repaint often stems from this inevitable aging process. Over time and exposure to environmental factors, the compounds within the paint undergo changes that compromise their adhesive qualities, leading to inevitable degradation.
The tell-tale signs of paint aging can be likened to the gentle wear of pages in a beloved book: fade lines where sunlight hits, corners lifting, and the once bold typeface becoming less pronounced. This degradation isn’t just about wear; it signals the time to refresh and renew:
| Signs of Aging | Problem | Solution |
|---|---|---|
| Fading color | UV light exposure | Repaint with UV-resistant paint |
| Cracking/Crazing | Paint drying out over time | Strip old paint, prime, and repaint |
| Peeling | Loss of adhesion | Remove loose paint, sand, and apply a fresh coat |
My appreciation for the cycle of renewal is deeply rooted in the understanding that no paint, no matter the brand or the promise, is impervious to the march of time. Accepting this cycle allows us to embrace the opportunity to repair and reimagine the spaces we call home.
Understanding the interplay between moisture, heat, and wall materials shapes our ability to prevent interior paint from peeling.
Diligent preparation, including proper cleaning, sanding, and priming, is foundational to securing paint adhesion and longevity.
Choosing suitable paints and primers for specific room conditions and surface materials counters the destructive effects of chemical reactions and environmental factors.
Accepting paint’s natural aging process allows homeowners to proactively manage their interior aesthetics, ensuring walls remain vibrant and intact.

Mike Katounas is the owner of Home Works Painting, a painting business in Northern Virginia. He has over 15 years of experience in residential interior and exterior painting, drywall installation/repair, carpentry, wallpaper removal, power washing, commercial painting, color consultation, and staining/sealing. Their service areas include Chantilly, Fairfax, Herndon, Oakton, Reston. Mike takes pride in his work, and he always follows a strict code of conduct that includes the use of quality paint, a clean workspace, and an honest, respectful approach to his customers.


Sorry, the comment form is closed at this time.